Microgreens trays: a guide to types and uses I
Good morning, everyone. As always, we hope you’re doing well. In today’s article, we’re diving into one of the most important aspects to ensure good results: choosing the right tray to grow your microgreens.
It’s not enough to use just any container. Differences in drainage, depth, or design can significantly affect germination, growth, and the final quality of your product.
Let us share our direct experience…
At the office, we first started growing microgreens using small trays of about 10×5 cm, square shaped, and made of very thin plastic. They were a good option, but they only held a small amount of microgreens.
Later, we wanted to grow larger quantities, so we switched to bigger, deeper, and thicker trays. Over time, we realized that wasn’t a good idea because their large size and high substrate capacity created too much humidity, which led to mold growth.
Finally, we found the perfect tray: lighter and not too deep, with less substrate capacity. This prevented excessive moisture and made mold less likely to appear.
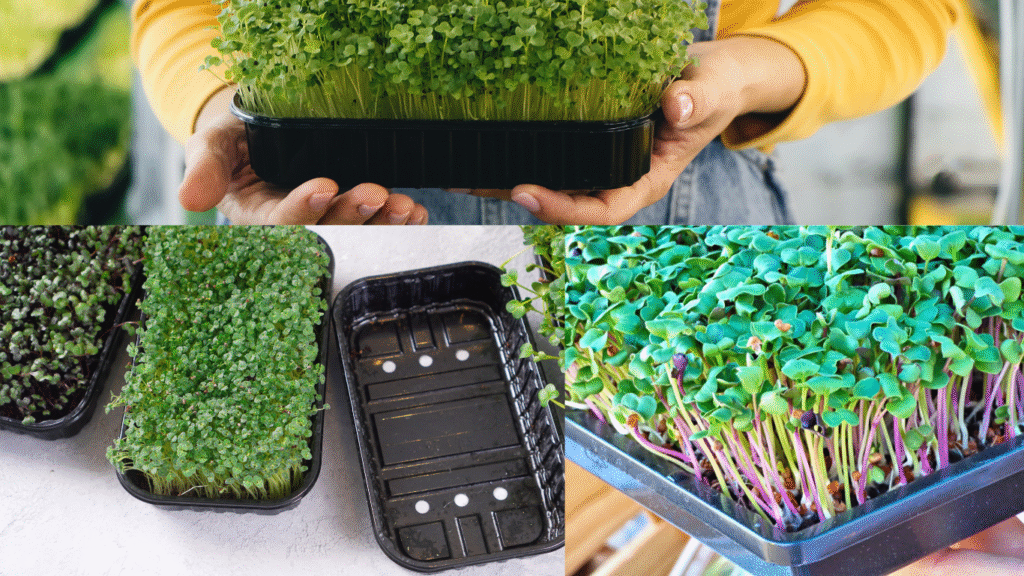
It’s worth mentioning that, in all cases, these trays consisted of two parts:
a tray with drainage holes, where we placed the substrate and sowed the microgreens, and a second tray without holes, which served as a base and was also used for bottom watering.
Additionally, we’ve used them for other purposes, such as performing the blackout stage.
As you can see, trays are a key element in this process. Let’s take a look at the different types and their differences.
Differences between trays with and without holes
One of the first decisions when growing microgreens is whether to use trays with holes or without them. As we’ve mentioned, we use both types together for planting, which, as you’ll see below, is the ideal setup.
With holes or slots
These trays are designed to allow excess water to drain, preventing waterlogging, one of the main causes of mold and root rot. They’re most recommended for the germination stage, especially for species with longer roots, such as peas or sunflowers.
Without holes
These are used as base trays for bottom watering. The tray with holes is placed on top, allowing water to rise through capillary action and moisten the substrate without directly wetting the leaves.
As you can see, this combination, a perforated tray inside a solid one, is the most commonly used system both at home and in professional setups, and it’s the most recommended.
Mesh or grid trays
Another common format is the mesh tray, characterized by a fully open or latticed base. We should mention that we don’t have direct experience with these; we’ve never actually used them for growing.
• They provide maximum ventilation and drainage, ideal for large seeds and crops that require more aeration.
• They’re popular for growing peas, wheat, or sunflower microgreens, as well as for propagating soil blocks.
• Their main drawback is that they require more careful humidity control, as they tend to dry out faster.
Which is better: shallow or deep trays?
As we mentioned in the introduction, depth is another crucial factor. The right tray will depend on the type of microgreen. Now that we understand this better, we’ll start applying it in our own growing setup.
Shallow trays (1–2.5 cm)
These are preferred for traditional microgreens such as arugula, mustard, or basil. They require less substrate, make harvesting cleaner, and reduce the risk of overwatering.
Deep trays (up to 6 cm)
These are recommended for crops with taller stems or stronger roots. They also allow you to keep the microgreens growing for a longer period before harvest.
A few tips!
• Always use clean and disinfected trays between each growing cycle, we recommend washing them with soap and water.
• Avoid watering directly over the leaves: bottom watering is safer and more efficient.
• Maintain this double-tray system: one with holes (for growing) and one without (for watering).
• Make sure trays do not retain stagnant water for more than a few hours.
We hope this guide has helped you better understand the importance of choosing the right trays for growing microgreens. In the next article, we’ll continue exploring more aspects of microgreen cultivation.
Thank you for reading, and see you next time!
Carlota
SOURCES
Bootstrap Farmer. (2025, June 27). What trays do you need for microgreens and propagation? Retrieved from https://www.bootstrapfarmer.com/blogs/microgreens/what-trays-do-you-need-for-microgreens-and-propagation?srsltid=AfmBOop9U9F50ZX5noIPHfOz0iqw_87ApVcz9iy8yLYcRiPU_Kml2YQS
HerbSpeak. Microgreen trays compared. Retrieved from https://herbspeak.com/microgreen-trays-compared/
HomeMicrogreens. Choosing microgreen trays. Retrieved from https://homemicrogreens.com/choosing-microgreen-trays/
Lake, J. A. Microgreen production: An evaluation of types of growing media [Manuscript]. Mountain Scholar. Retrieved from https://mountainscholar.org/items/96a13265-78a0-488d-9461-2c60ce1e9d89
MP Seeds. Top trays for microgreens. Retrieved from https://mpseeds.eu/top-trays-for-microgreens